On this page
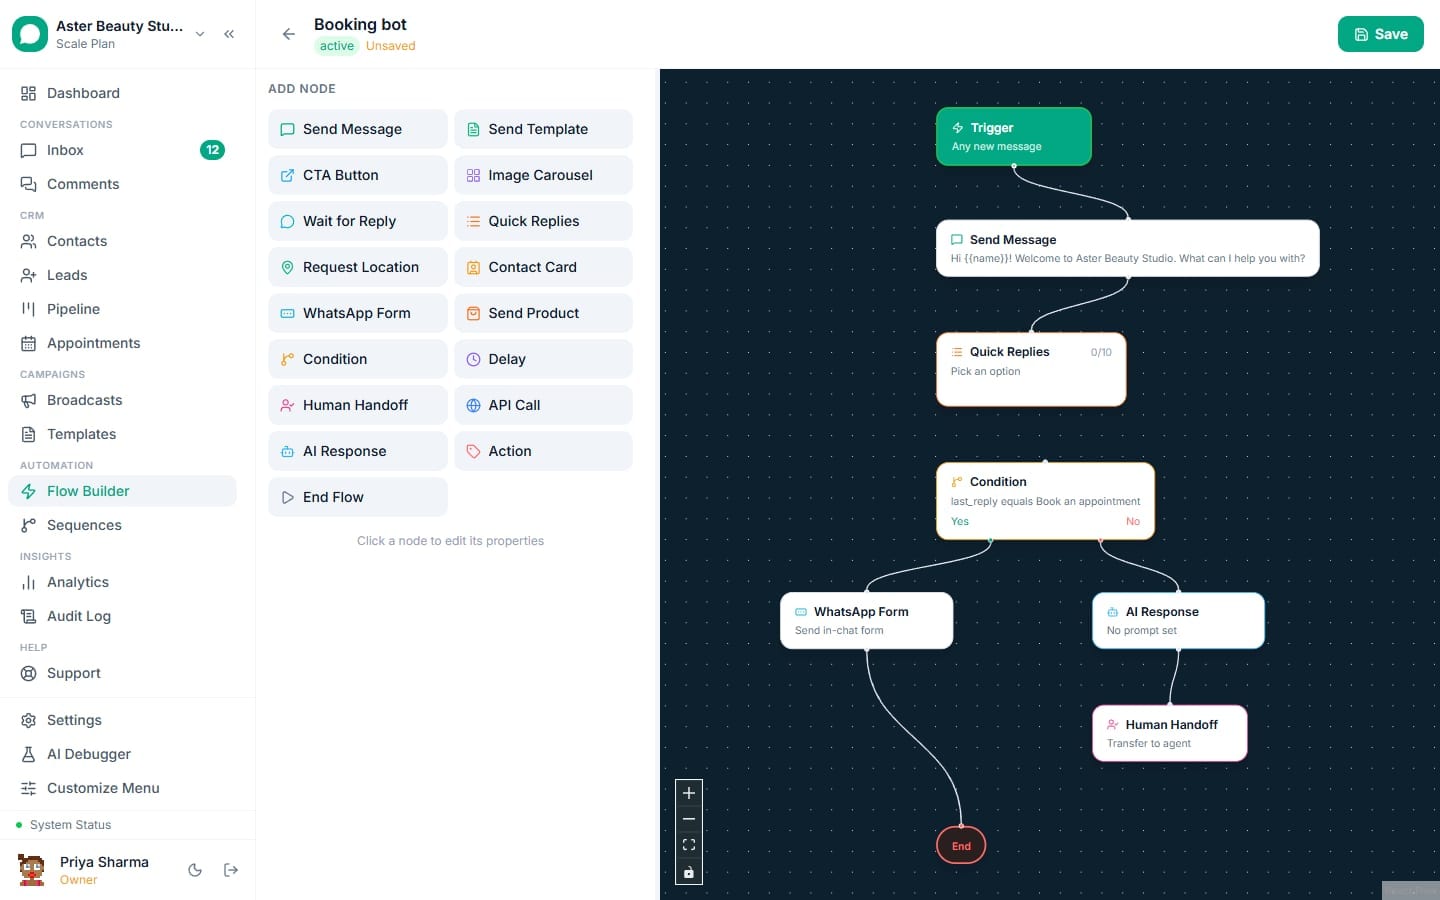
Flow Builder is the drag-and-drop canvas where you wire together an automated WhatsApp conversation: a trigger that starts it, a chain of nodes that send messages, branch on a customer's answer, wait, call an API, or bring in a human, and edges that connect them. This article covers how to actually build and test a flow, once you already understand what a single node does; for the field-by-field reference of every node type, see the flow node reference.
Flow Builder: first 5 of 8 steps
- 1Open Flow Builder and start a flow
- 2Configure the trigger node
- 3Drag nodes onto the canvas
- 4Connect nodes with edges
- 5Fill in each node's settings
Before you start
- Any Owner or Admin can create and edit flows by default; the permission is "Create flows," and most custom roles that include it can too.
- Flow Builder has no plan gate and no cap on the number of flows or nodes. What is plan-gated elsewhere is volume: agent seats, contacts, and conversations per month.
- Testing a flow on a real customer channel requires a connected WhatsApp number. You can build and save a draft flow without one, but the "message yourself" test step needs a live connection.
- The AI Response node needs at least one AI provider key configured in Settings, then AI & Flows. Groq's key is free, so this works on every plan without a purchase.
- Decide your trigger before you start placing nodes. A flow with no trigger set still saves, but it never fires until you configure one; see flow triggers for the six trigger categories.
Steps
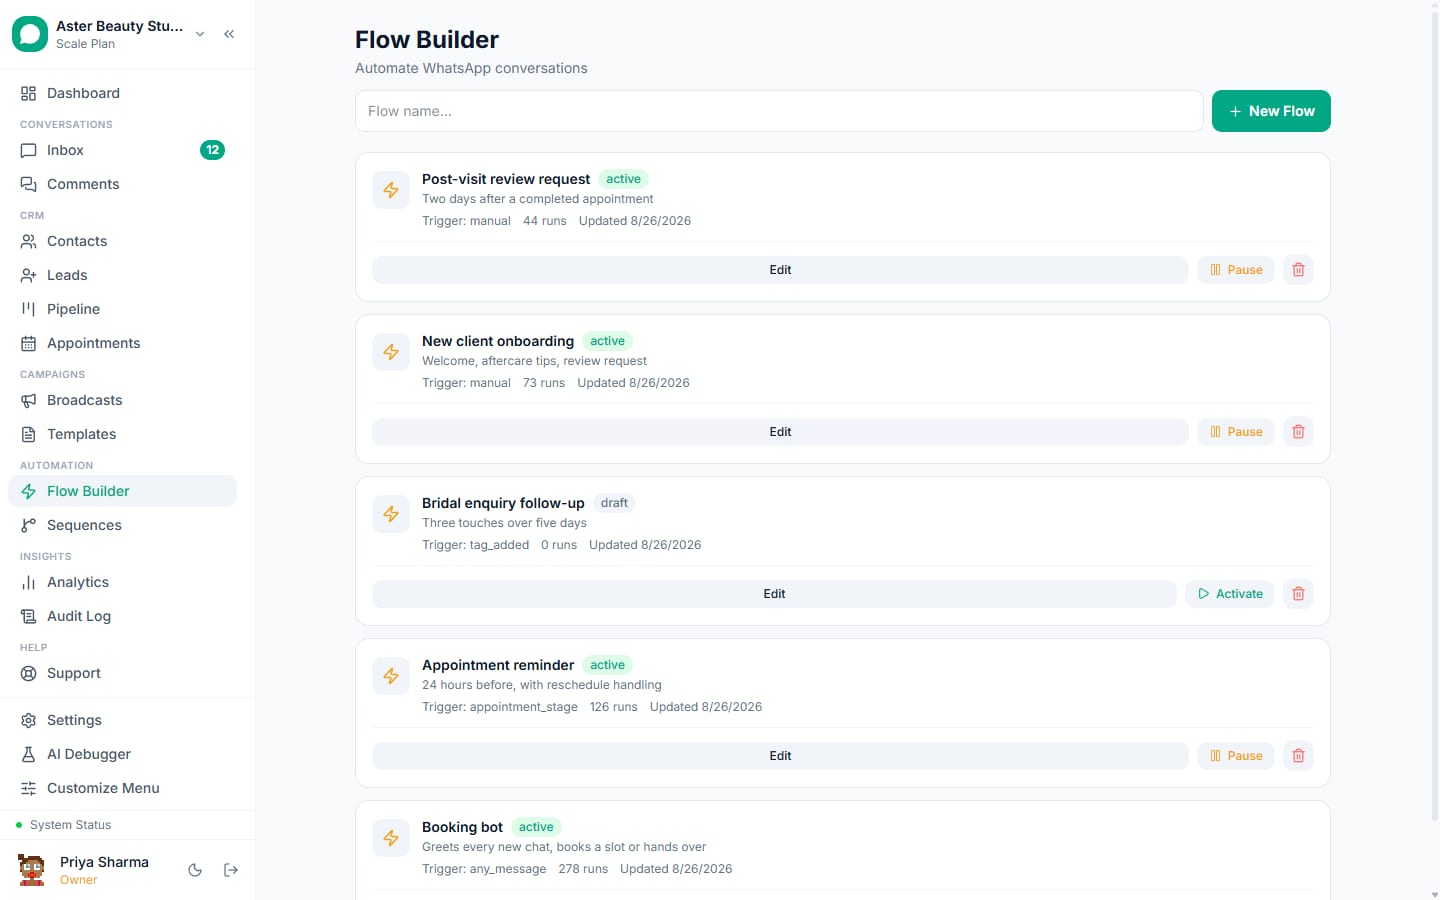
- Open Flow Builder and start a flow. From the main navigation, click Flow Builder, then New Flow. Give it a name that describes what it does rather than when you built it ("Price enquiry auto-reply" reads better six months from now than "Flow 3").
Configure the trigger node. Every new flow starts with a trigger node set to Keyword / Inbound Message. Click it and either type one or more comma-separated keywords, or leave the field blank so the flow catches any inbound message that no keyword flow claimed first. Switch the Trigger Type dropdown if you want a different trigger category: Contact enters a Segment, Contact receives a Tag, Appointment Booked, Appointment Reminder, Appointment Completed, or Form Submitted.
Drag nodes onto the canvas. The node palette on the side lists all 16 working node types: Send Message, Send Template, CTA Button, Image Carousel, Wait for Reply, Quick Replies, Request Location, Contact Card, WhatsApp Form, Send Product, Condition, Delay, Human Handoff, API Call, AI Response and Action. Drop a node anywhere on the canvas; it appears as a box you can drag into position.
Connect nodes with edges. Drag from the small handle on the right edge of one node to the left edge of the next to wire them together. A Condition node exposes two handles, labeled true and false, so you can connect a different next step to each outcome; a Quick Replies node with more than one button exposes one handle per button.
Fill in each node's settings. Click any node to open its properties panel. A Send Message node needs body text; a Send Template node needs a template name, language and variable mapping; a Delay node needs a duration or a relative-to-appointment offset; an AI Response node needs a system prompt and, optionally, a knowledge base. Use
{{name}}and{{phone}}to personalize any message with the contact's own details, or{{variable_name}}for a variable set earlier in the flow (by a Quick Replies choice, an API Call response, or a Set Variable-style Action node).Save and activate. Flip the flow's status from Draft to Active on the Flow Builder list or from inside the editor. Only Active flows respond to real inbound messages or events; Draft flows exist but never fire.
Test it on your own connected number. Message your own WhatsApp number with the trigger keyword (or trigger the event another way, such as booking a test appointment). There is no separate sandbox environment for flows; the live number is the test environment, so you exercise the exact node graph a real customer will run.
Watch the run counter and refine. Each flow's list entry shows how many times it has executed. Open it again to tighten a reply, add a branch, or connect a Human Handoff node once you have seen it run for real; every change applies to executions that start after you save.
What you will see
An active flow with a keyword or catch-all trigger answers a matching WhatsApp message within seconds of it arriving, day or night, without anyone on your team touching a keyboard. The flow's run counter on the Flow Builder list increases by one for every execution, whether it started from your own test message or a real customer's. Inside the conversation thread, every message a flow sends is visible exactly like a message an agent sent manually, including a logged entry when a free-form node could not send because the 24-hour window was closed.
Settings and options
| Setting or field | What it does | Default |
|---|---|---|
| Flow status | Draft, Active, Paused or Archived; only Active flows respond to real triggers | Draft |
| Trigger type | Keyword / Inbound Message, Contact enters a Segment, Contact receives a Tag, Appointment Booked, Appointment Reminder, Appointment Completed, or Form Submitted | Keyword / Inbound Message |
| Keywords | Comma-separated list; leave blank to catch any message no keyword flow claims first | Blank |
| Run counter | How many times the flow has started an execution | 0 |
| 24-hour window guard | Applies automatically to every free-form send node; template nodes are unaffected | Always on, not configurable |
| Opt-out and block check | Runs before every node in the graph, including on resume after a wait | Always on, not configurable |
| Version history | Not available; duplicate a flow before a risky edit to keep a fallback copy | Not saved |
Troubleshooting
| Symptom | Likely cause | Fix |
|---|---|---|
| Nothing happens when I message the trigger keyword | The flow is still in Draft status | Toggle the flow to Active from the list or the editor |
| Two nodes seem connected but the flow skips one | The edge was dragged to the wrong handle, commonly on a Condition or Quick Replies node with several handles | Delete the edge and reconnect it from the exact labeled handle (true, false, or the specific button) |
| A scheduled message never arrives after a multi-day Delay | A free-form node hit the closed 24-hour service window and logged a failed message instead of sending | Open the conversation to confirm, then switch that step to a Send Template node, which is unaffected by the window |
| The flow ran once for a contact and never again | Only one active execution of a given flow per contact is allowed at a time; a second trigger while one is still running or waiting is a no-op | This is expected behavior; if you want repeatable triggers, check whether the earlier execution finished or is still waiting on a Wait for Reply or Delay step |
| An edit to a live flow does not seem to change what customers see | An execution already in progress runs on the version of the flow it started with | Test the change again on your own number; only new executions pick up the update |
| The AI Response node returns a generic fallback answer | No AI provider key is configured, or the key saved on the node has since been removed | Add a key in Settings, then AI & Flows; the node falls back to any other available key automatically, but at least one must exist |
Related reading
Once your nodes are in place, check flow triggers for every way a flow can start, and the flow node reference for the exact fields each node type takes. If this is your very first flow, the shorter build your first flow walkthrough covers the same ground with fewer moving parts.