On this page
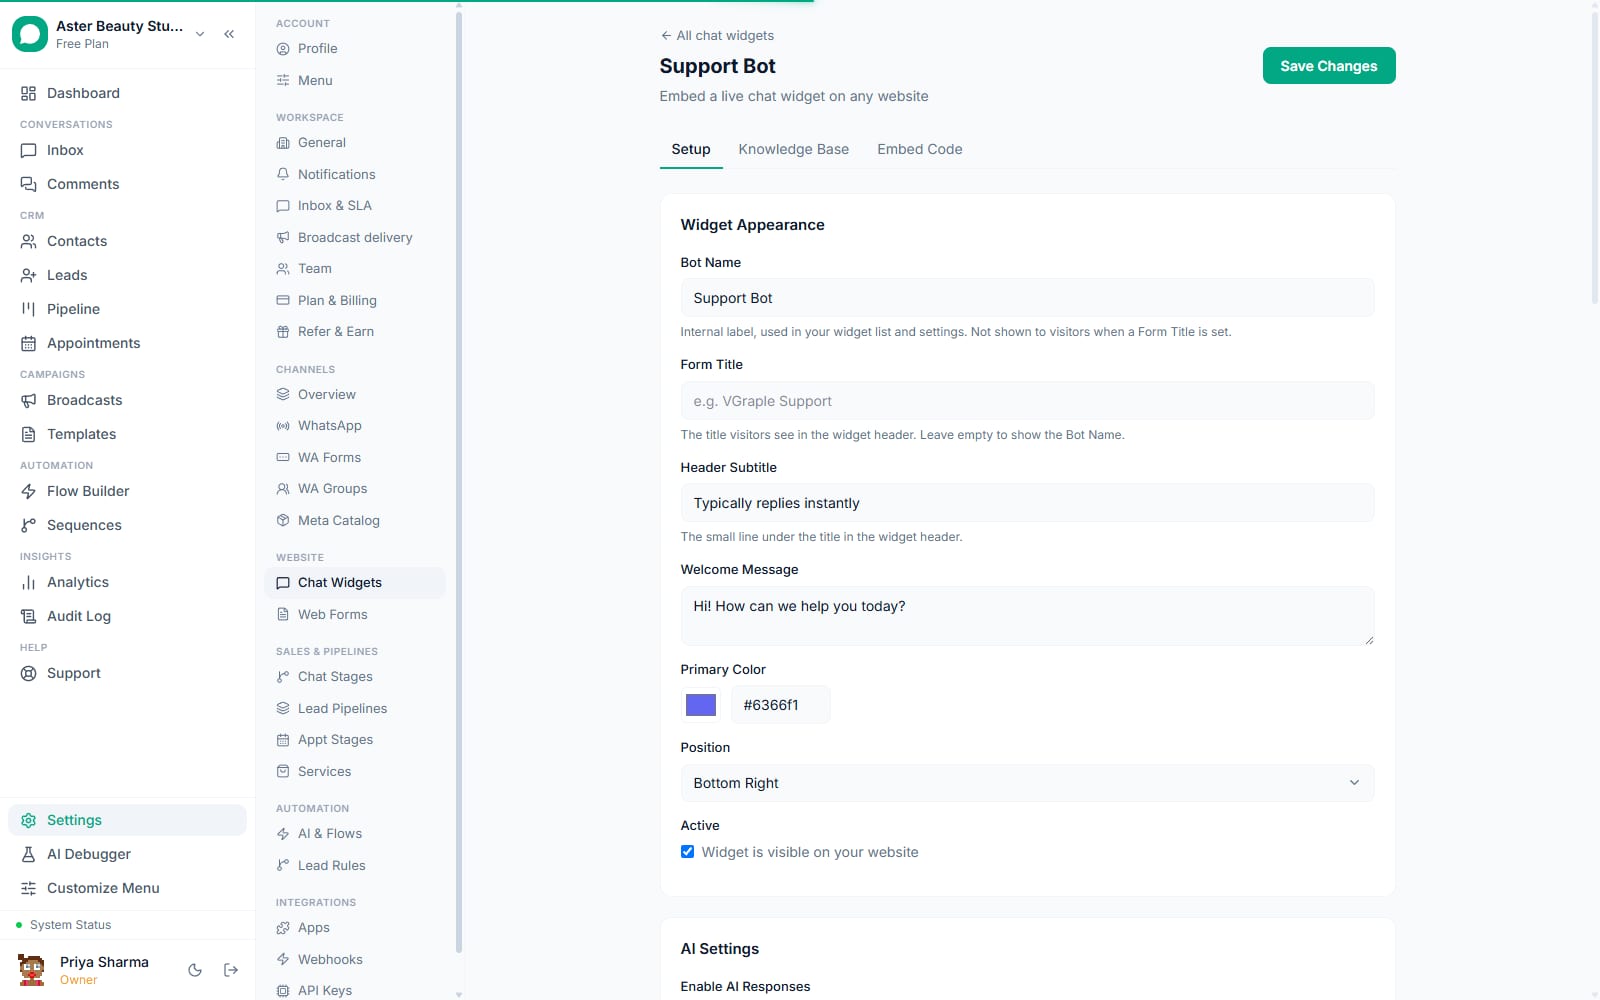
Installing the chat widget means creating it under Settings, then Chat Widgets, filling in its Setup and Knowledge Base tabs, then copying two script tags from the Embed Code tab into your site just before the closing body tag; no other deployment step is needed on your side.
Chat widget setup: first 5 of 7 steps
- 1Go to Settings, then Chat Widgets, and
- 2Fill in the Setup tab
- 3Add the domain allow-list and bot disclosure
- 4Switch to the Knowledge Base tab and
- 5Configure lead capture, if you want it
Before you start
- Widget count is capped by plan: 1 on Free, 10 each on Starter and Growth, unlimited on Scale.
- You need access to edit your website's HTML, or a platform (WordPress, Webflow, Shopify) with a custom code or tracking-scripts section.
- The AI assistant behind the widget needs a connected AI provider key; a hosted Groq model is free to connect, and the AI assistant as a plan feature requires Growth or above unless your organisation is grandfathered in.
- Decide what you want the widget to know before you start: pricing, policies, FAQs, or documents, since a widget with no knowledge added will answer very little.
Steps
- Go to Settings, then Chat Widgets, and create a new widget. Give it a name; this is internal only and is not shown to visitors.
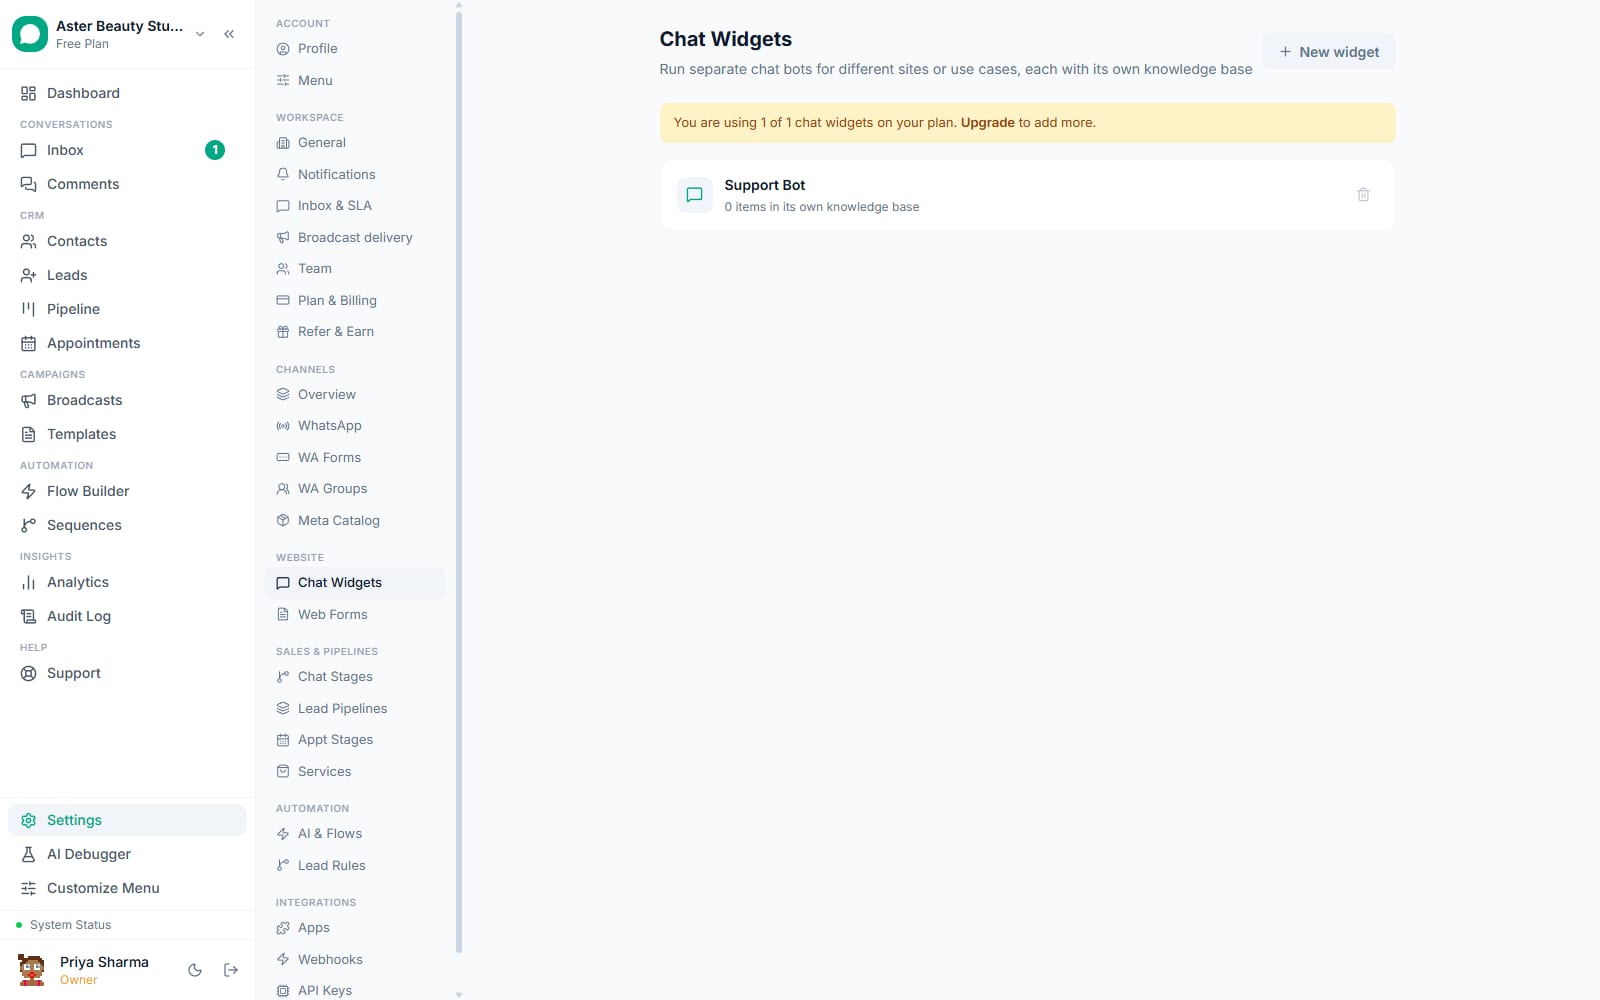
Fill in the Setup tab. Set the header title and subtitle, welcome message, primary colour, and launcher position under Widget Appearance. Choose an AI model from a provider you have a key for, and turn on the actions you want the assistant to use: capture leads, request appointments, search your catalog, or hand off to a human.
Add the domain allow-list and bot disclosure. List the domains the widget is allowed to run on (leave empty during testing), and set the bot disclosure message plus how often it repeats to a returning visitor.
Switch to the Knowledge Base tab and add content. Paste FAQs, upload documents, or point it at a URL. Turn on Knowledge Only mode if you want every answer strictly limited to what you have added here.
Configure lead capture, if you want it. Turn it on, choose which fields to show and require (name, email, phone with a country-code picker covering more than 30 countries), and pick the pipeline a captured lead should land in.
Open the Embed Code tab and copy the script. It is two script tags: one that sets your widget's token, and one that loads the widget itself, both carrying your widget's unique embed token.
Paste it into your site, just before the closing
</body>tag. On WordPress this is usually a theme's footer script area or a code-insertion plugin; on Webflow and Shopify, a custom code or tracking-scripts section serves the same purpose. The launcher appears immediately once the page loads with the script present.
What you will see
A chat launcher appears in the position you chose (usually bottom-right) on every page where the script tag is present. Opening it loads the chat panel as a lazy iframe, so an unopened widget costs almost nothing on page load. Once a visitor has a conversation and it hands off, it appears in your shared team inbox tagged as a web chat conversation with the AI's transcript shown above the point a human took over.
Settings and options
| Setting or field | What it does | Default |
|---|---|---|
| AI model | Which connected provider answers for this widget | Whichever provider your organisation has a working key for |
| Knowledge Only mode | Restricts every answer strictly to the widget's own knowledge base | Off (assistant can reason more broadly, still steered by its knowledge) |
| Allowed domains | Up to 20 domains the widget is permitted to load and message from | Empty (unrestricted) until you add domains |
| Lead capture | Shows a form for name, email and phone and creates a contact/lead on submit | Off until turned on |
| Bot disclosure and repeat interval | The message telling a visitor they are talking to an automated assistant, and how often it repeats | Set per widget; required for compliance with Meta and general disclosure norms |
| Knowledge sharing | Whether this widget's knowledge base is scoped to itself or shared with your other widgets and WhatsApp AI chatbot | Scoped to the widget unless you share it |
Troubleshooting
| Symptom | Likely cause | Fix |
|---|---|---|
| Launcher does not appear on the site | The script was pasted somewhere it never executes (inside a comment, a page builder's preview-only area) or the page has not been republished since adding it | Confirm the script renders in the page's live HTML source, not just the editor, and republish the site if needed |
| Widget loads but the AI answers incorrectly or not at all | No knowledge has been added yet, or Knowledge Only mode is on with content that does not cover the question | Add or expand content on the Knowledge Base tab; turn off Knowledge Only if some general reasoning is acceptable |
| "This widget is not allowed on this domain" or similar block | The allowed domains list has entries but the current site is not in it | Add the site's domain to the allow-list on the Setup tab |
| Handoff conversation never appears in the inbox | The AI has not been asked for a human and no fallback condition triggered escalation | Confirm the hand-off action is turned on for the widget; a visitor can also type a direct request like "talk to a person" |
| Two widgets on the same page interfere with each other | Each widget is scoped by its own embed token, so this is unusual; check for a duplicated or mismatched script tag | Confirm only the intended widget's script tag is present on that page |
Related reading
Feed the widget the same knowledge as your AI chatbot if you want consistent answers across WhatsApp and the website. See the inbox tour for how a handed-off web chat conversation appears, and escalating from AI to a human for how the handoff itself behaves.